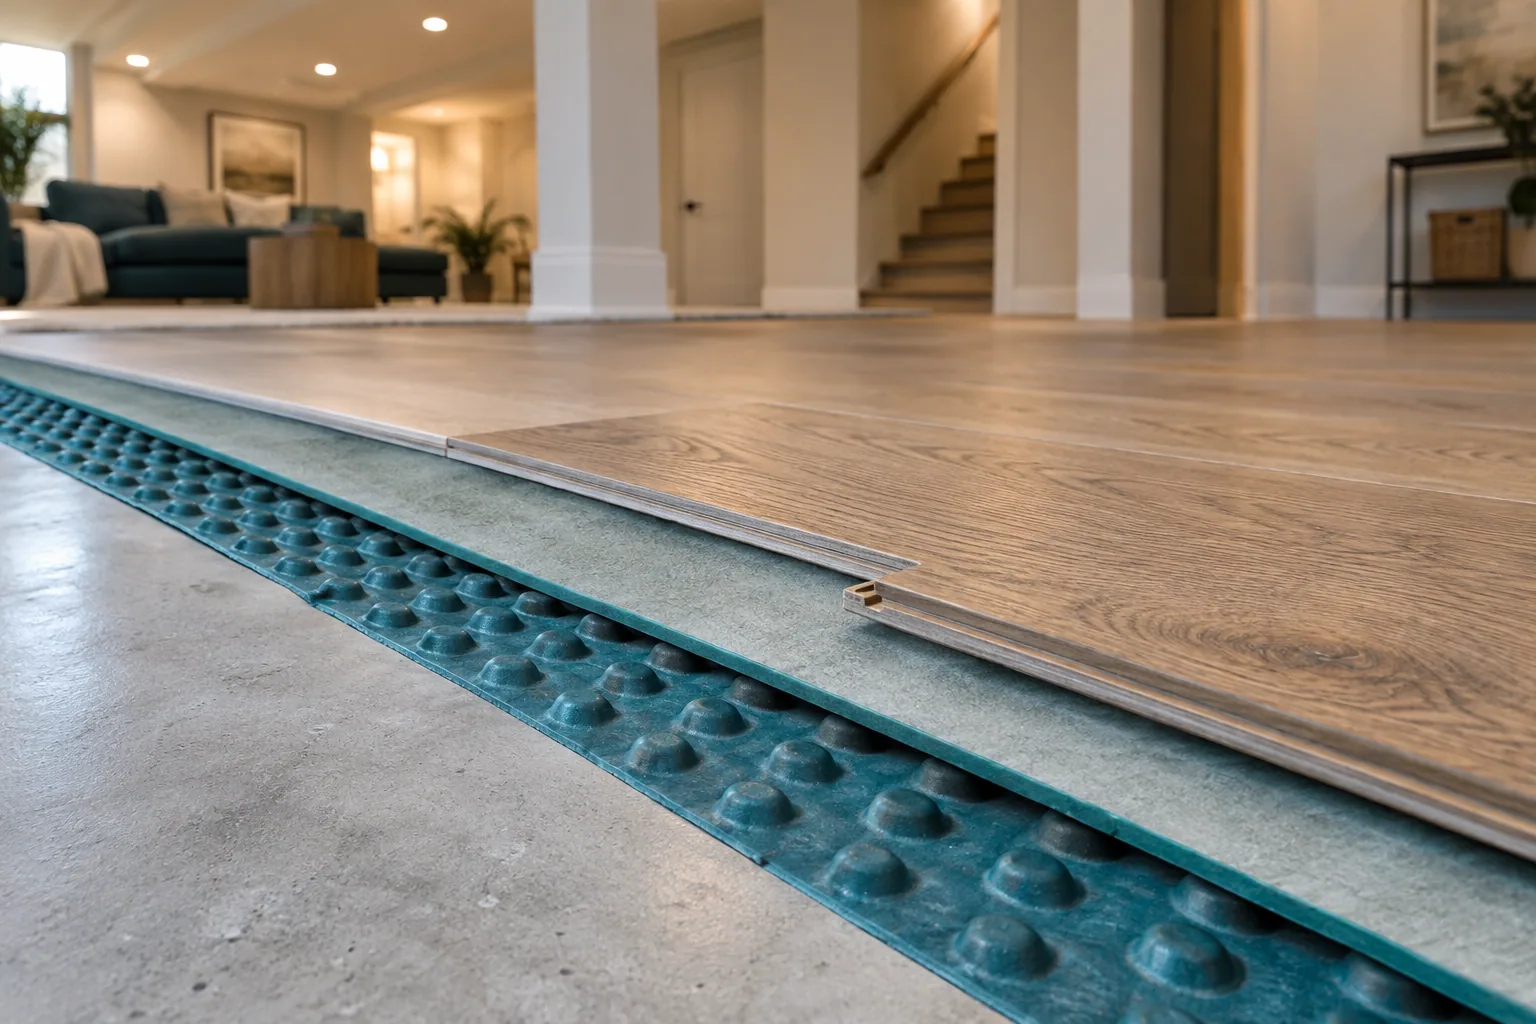
The best basement subfloor is the assembly that matches your slab moisture, floor covering, available height and comfort target. Compare five systems using the same measured area and a complete materials list.
Before ordering a floor system, check slab moisture, available headroom, stair transitions, and the finish flooring instructions for the planned rooms. Calgary basement renovation can help coordinate basement flooring decisions with the renovation scope, finished heights, and the practical needs of your Calgary home.
A basement subfloor sits between the concrete slab and the visible floor finish. Depending on the system, it can provide a supported surface, a thermal break, moisture separation, or several of these functions. A thin underlayment is not automatically a structural subfloor, and neither product repairs an actively leaking foundation.
For Calgary homeowners, the choice affects more than what the floor feels like under bare feet. Raising the floor changes stair transitions, door clearances, bathroom thresholds and the remaining ceiling height. Choosing the finish first and checking those conditions later can turn an inexpensive product into an expensive installation.
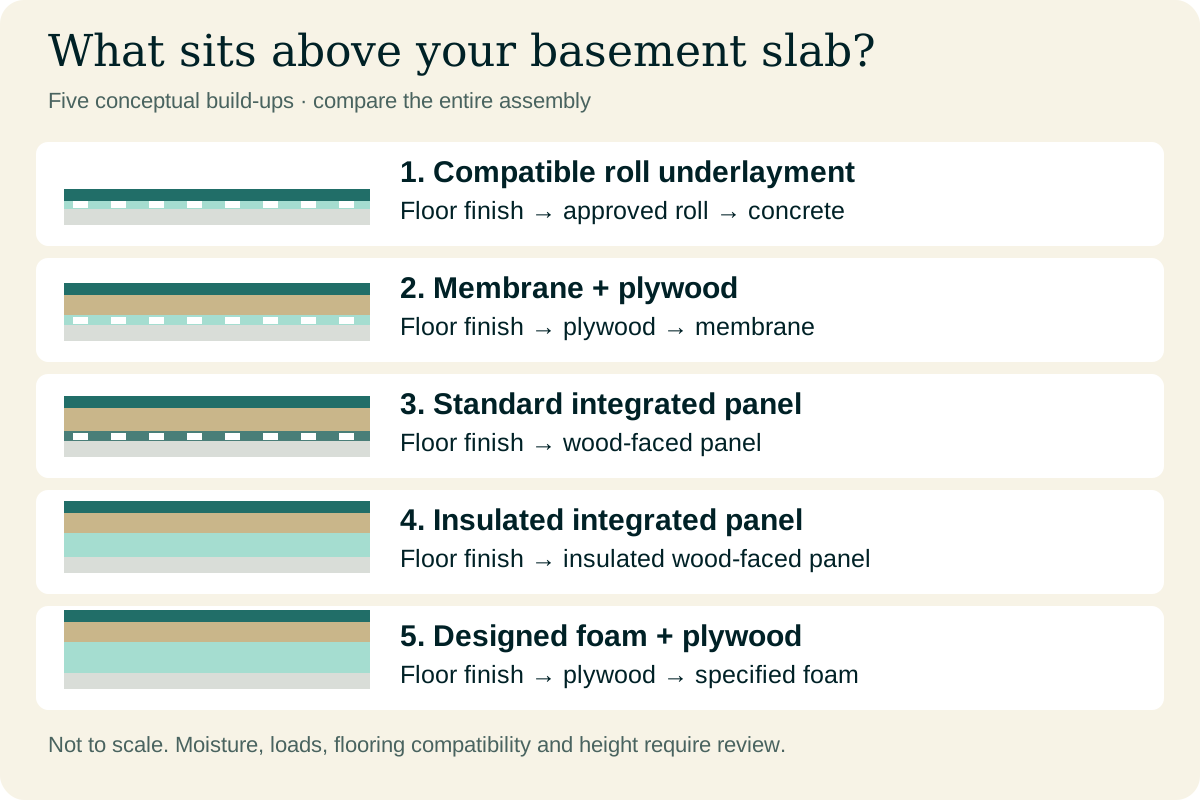
This comparison covers five distinct assemblies: compatible roll underlayment, dimple membrane with plywood, standard integrated panels, insulated integrated panels, and a designed rigid-foam-and-plywood assembly. Cost figures are transparent planning examples in Canadian dollars dated October 7, 2026; they are not verified store prices, contractor quotes or predictions of future prices.
Which five basement subfloor systems should you compare first?
Compare the complete assembly, rather than the price printed on one package. A membrane that needs plywood cannot be fairly compared with a panel that already includes a wood surface. Likewise, an insulated panel and an uninsulated roll solve different comfort problems even when both are marketed for basements.
The table uses deliberately selected material allowances to demonstrate budgeting. Each amount is an input you can replace with a written supplier price. The example covers 600 square feet of net floor area with a uniform 10 percent purchasing allowance, giving 660 square feet for calculation. Real waste depends on room geometry and package coverage.
Labour, delivery, GST, slab preparation, repairs, adhesives, tapes, transitions and the final floor covering are excluded unless your own quote expressly includes them. These exclusions matter because preparation can exceed the difference between two subfloor products.
To turn the example into a purchasing list, calculate coverage from the supplier’s stated usable dimensions and round up to complete packages. For a deliberately simple illustration, a product sold in 20-square-foot packages would require 33 packages to supply 660 square feet. A package with 18 square feet of usable coverage would require 37 packages, supplying 666 square feet. These are arithmetic examples, not the package sizes of the named products. Keep unit cost, usable coverage and package count in separate columns so a discount on one package size can be compared fairly with another.
| System | Assumed material rate | 600 sq ft plus 10% allowance | Main comparison point |
|---|---|---|---|
| 1. Compatible roll underlayment | CAD $1.25/sq ft | CAD $825 | Low build-up; flooring compatibility controls |
| 2. Dimple membrane plus plywood | CAD $3.00/sq ft | CAD $1,980 | Includes assumed membrane and plywood only |
| 3. Standard integrated panels | CAD $3.50/sq ft | CAD $2,310 | Wood face and moisture separation combined |
| 4. Insulated integrated panels | CAD $4.50/sq ft | CAD $2,970 | More insulation with a thicker assembly |
| 5. Designed rigid foam plus plywood | CAD $4.00/sq ft | CAD $2,640 | Layer design and load distribution must be verified |
When does a compatible roll underlayment make sense?
A compatible roll underlayment makes sense when preserving height and using an approved floating floor are priorities. The roll can be lighter to carry downstairs and easier to position in an open room than large sheets. Its usefulness depends on the exact floor product above it, especially the locking joint and required support.
For example, DMX lists 1-Step 2.0 compatibility with vinyl plank at least 5 mm thick, laminate and engineered hardwood. That statement does not authorize every product in those categories. Obtain confirmation from the flooring manufacturer as well, including whether a factory-attached pad changes the permitted assembly.
Use the illustrative CAD $1.25 per square foot only as a worksheet input. A product requiring additional boards, special joint tape or a different floor finish belongs in a revised budget. Ask who accepts responsibility if the selected underlayment and flooring instructions conflict. A low-profile package is a strong candidate for a dry, suitable slab; it is a poor shortcut around unresolved slab movement or unsupported joints.
According to DMX Plastics, DMX 1-Step flooring compatibility; checked October 7, 2026.
When is dimple membrane with plywood the better choice?
Dimple membrane with plywood is worth comparing when you want a separate moisture-control layer and a wood load-distribution surface. Keeping the layers separate gives the designer flexibility, but it also creates more interfaces to specify: membrane joints, plywood joints, edges, penetrations and the floor finish above.
Dörken describes DELTA-FL as an 8 mm dimple membrane that provides a capillary break and vapour barrier. The 8 mm measurement belongs to the membrane alone. Adding plywood and a finish increases the total height, so do not use the membrane dimension as the finished-floor increase.
Our CAD $3.00 per square foot example groups membrane and plywood into one assumed allowance. Your actual quotation should identify plywood grade, thickness, fastening or floating method, compatible tapes and waste separately. Consider the route downstairs before ordering large sheets. Tight stairs, landings and doorways can affect handling and cuts, while cuts affect support and joint layout. This system deserves a complete detail rather than an improvised stack of individually suitable materials.
According to Dörken Systems, DELTA-FL dimple membrane specifications; checked October 7, 2026.
What do standard integrated subfloor panels provide?
Standard integrated panels combine a wood surface with a manufactured underside in manageable units. They can simplify purchasing because the main layers arrive together. They still need the slab condition, panel layout, perimeter gaps and floor-covering details required by their installation instructions.
DRICORE lists its standard panel at 3/4 inch, approximately 19 mm, and reports an R-value of 1.4. Those are product specifications, not a promise that every basement will reach a particular temperature or energy saving. Add the thickness of your chosen finish when checking doors and stairs.
The illustrative allowance is CAD $3.50 per square foot before excluded items. Compare delivered panel coverage, not nominal package dimensions, and check whether small offcuts remain useful in the next row. Integrated panels are attractive when handling and predictable components matter. However, the wood face still needs appropriate moisture conditions; a waterproof-looking underside does not make prolonged flooding harmless. Keep the product instructions and final flooring warranty together so the installer follows both documents.
According to DRICORE, DRICORE Subfloor panel specifications; checked October 7, 2026.
When is an insulated integrated panel worth the extra cost?
An insulated integrated panel is worth considering when floor comfort is important enough to justify its height and material premium. A playroom, desk area or bedroom may place more value on a thermal break than a storage room that people enter briefly. Decide where the benefit matters before selecting the same assembly everywhere.
DRICORE specifies its R+ panel at 1 inch, approximately 25 mm, with an R-value of 2.7. Compare these manufacturer values with the standard panel values, but do not interpret them as whole-basement insulation performance. Walls, air leakage, heating distribution and slab conditions also affect comfort.
At the illustrative rates, the insulated option adds CAD $660 to the 600-square-foot material example compared with standard panels: 660 purchased square feet multiplied by a CAD $1.00 difference. That arithmetic is useful even after you replace both rates with real quotes. Ask whether this premium causes other costs, such as door adjustments or stair work. A small material difference can be reasonable; an unplanned height conflict can change the decision.
According to DRICORE, DRICORE R+ insulated panel specifications; checked October 7, 2026.
When should you consider rigid foam with a plywood surface?
A designed rigid-foam-and-plywood assembly can be appropriate when insulation and custom detailing outweigh the simplicity of a packaged system. The word designed matters: foam type, compressive performance, board layers, joint arrangement and the supported flooring must work together under the anticipated loads.
Natural Resources Canada discusses basement floor insulation within its broader basement guidance. That guidance provides building-science context, rather than approval for any combination of foam and plywood. Ask the designer to identify the moisture-control strategy and explain how concentrated loads, transitions and service penetrations are handled.
The CAD $4.00 per square foot allowance in this comparison is a hypothetical material input. It does not establish the price of a specified assembly because no universal foam thickness or plywood build-up is being prescribed here. This option can suit a project with adequate headroom and a coordinated insulation plan. It becomes less attractive when the room is already height-constrained or the design would require difficult changes at stairs, doors and adjoining tiled areas.
According to Natural Resources Canada, Keeping the Heat In: basement insulation; checked October 7, 2026.
Planning a basement renovation?
Discuss your budget, layout, and timeline with our Calgary team.
Call (587) 407-2620Which moisture problems must be solved before a subfloor is chosen?
Active leaks, recurring damp patches and unexplained staining need investigation before they are covered. A flooring salesperson can explain product limits, but a sample board cannot diagnose why water reaches the slab. Record where moisture appears, when it appears and whether the pattern changes after rain, snowmelt, laundry use or plumbing operation.
Separate bulk water from water vapour and condensation in your project notes. Water entering through a foundation joint is a different problem from humid room air meeting a cold surface. The remedies and the evidence needed before installation are therefore different. Ask the contractor which condition was found and what observation supports that conclusion.
Health Canada recommends addressing the moisture source when dealing with indoor mould. Avoid treating a membrane as permission to enclose contaminated materials. Request the flooring manufacturer's required concrete moisture assessment and acceptance limits in writing. A surface that looks dry during one visit is not a test result, and a generic plastic-sheet demonstration does not replace a specified testing method.
According to Health Canada, Addressing moisture and mould indoors; checked October 7, 2026.
How do subfloor height and slab flatness change the decision?
Height and flatness can eliminate an otherwise attractive system before price becomes relevant. Measure from the existing slab to the underside of beams, ducts and the intended ceiling finish. Then subtract the complete proposed floor build-up, including membranes, boards, underlay and finish. Label each measurement on the room plan.
Check the bottom stair transition separately. Raising the basement floor can change the bottom riser relationship even when the upstairs stairs remain untouched. Give the finished-floor elevation to the stair designer or contractor before materials are ordered, rather than expecting a threshold strip to solve every difference.
Flatness is also different from level. A slab can slope consistently yet be reasonably flat, or appear level overall while containing local humps. Floating flooring often cares about local deviations that stress its joints. Have the installer compare measured deviations against both manufacturers' tolerances. Record preparation as a separate quote line, including what happens if grinding or patching reveals another issue. Do not rely on thicker padding to hide an unsuitable surface.
Use a full assembly sample to make the height discussion concrete. Ask the installer to show the selected layers beside an existing doorway and at the stair landing before installation begins. Label the measured thickness of each layer on the drawing, including any preparation that raises the surface. If two rooms use different finishes, compare their completed elevations rather than matching only their subfloor thicknesses. A tile assembly and a floating plank assembly may need different underlying details to arrive at a deliberate transition. Resolve that detail while the layout can still change, rather than accepting an improvised raised strip after both rooms are finished.
How should you compare quotes without missing major costs?
Compare quotes using the same room boundaries, finish, preparation assumptions and exclusions. Send each bidder a marked plan showing areas that receive subfloor and areas that do not. Mechanical rooms, showers, hearths, built-ins and storage rooms can change both quantity and detailing.
For a useful quote comparison, separate slab preparation, the subfloor assembly, accessories, installation labour and the final floor finish. Ask whether waste is included in the quoted area or added afterward. Delivery, stairs-only access and disposal should also be visible rather than discovered when the installer arrives.
A written allowance is not a fixed-price promise. State what will trigger a revision and how the revision will be approved. For example, request a unit rate or agreed method for additional patching after the slab is measured. The cheapest headline rate may be good value when the scope is complete; it may be misleading when it omits work that every option requires.
For a second quote check, separate the base scope from optional comfort upgrades. Request one complete compliant assembly and one clearly priced alternative, with the changes listed. Ask whether the upgrade changes only materials or also preparation, labour and door adjustments. This prevents an apparently small per-square-foot premium from concealing a larger scope change. Retain the same finish and measured area in both comparisons wherever possible. If an alternative requires a different floor finish, include that difference explicitly. The decision then becomes a comparison of completed outcomes, with a known total cost, rather than a contest between isolated product labels.
- Ask for exact manufacturer and product names, not simply insulated subfloor.
- Request finished-floor height at stairs, doors and bathroom transitions.
- Identify the moisture and flatness conditions assumed in the price.
- Keep product instructions, warranty terms and installer exclusions with the accepted quote.
Which system suits bedrooms, bathrooms and exercise rooms?
Choose the assembly by room use and flooring requirements, then coordinate the junctions between rooms. A bedroom may prioritize comfort underfoot. For more on basement bathroom layouts, costs, and rough-ins compare fixture clearances, plumbing routes, ventilation, waterproofing, rough-ins, and finish choices before construction details are fixed for the finished room. A bathroom needs a suitable waterproofing and floor-finish assembly. An exercise room introduces equipment loads, dropped weights and movement that a general residential floor comparison may not cover.
Do not carry a living-room detail into a shower simply because the products are already on site. Have the bathroom designer establish the substrate, waterproofing, drains and transitions together. For heavy equipment, provide the manufacturer’s weight and contact-point information before the floor assembly is selected.
A consistent finished height can be convenient, but identical hidden layers are not always necessary. Compare the cost of coordinated room-specific assemblies with the cost of forcing one system throughout the basement. The examples in basement bedroom ideas and egress planning connect bed placement, storage, privacy, and usable escape routes so comfort does not come at the expense of safe everyday use. Keep future use in mind: changing a storage area into a bedroom later involves more than flooring, including a review of the room’s approved use and other applicable requirements.
What should you decide before ordering basement subfloor materials?
Decide the finish, moisture strategy, complete height and installation responsibilities before ordering. Build a small decision sheet containing the measured area, chosen product, supporting documents, supplier price and unresolved conditions. If a condition could change the system, resolve it before committing to non-returnable materials.
Use a simple selection sequence. First reject assemblies that conflict with moisture conditions or manufacturer requirements. Next reject assemblies that create unacceptable height or transition problems. Finally compare comfort, handling, total installed cost and repair access among the remaining options. This sequence prevents a sale price from controlling a technical decision.
For a broader basement development, confirm how the floor fits the permitted plan and inspection sequence. Calgary identifies first-time basement development as work requiring a building permit. Coordinate the flooring decision with walls, stairs, rooms and services rather than treating it as an isolated purchase. The best subfloor is the one whose entire assembly can be specified, priced and installed consistently in your particular basement.
According to City of Calgary, Calgary home renovation and basement permits; checked October 7, 2026.
How do Calgary slab conditions change the subfloor decision?
A Calgary basement floor should be assessed across the whole slab, not at one dry corner. Map cracks, staining, efflorescence, previous patches, low areas, floor drains, sump locations, plumbing cuts, and transitions to stairs or exterior doors. Ask whether water appeared during spring melt, intense rain, a plumbing failure, or a sewer event, because each points to a different investigation. A subfloor can improve comfort and drying potential, but it should not be used to conceal an active leak or unresolved drainage problem.
Finished height is a local design constraint as important as insulation value. Many Calgary basements already have limited clearance below beams, ducts, and stairs. Add the slab preparation, panel, underlay, finish flooring, and required transitions to calculate the real elevation. Then check door clearances, appliance openings, bathroom thresholds, stair risers, and the bottom of guards or rail details. A high-performance assembly that creates unsafe or awkward transitions is not automatically the best system for the house.
Calgary’s cold season also changes how the floor feels and dries. Compare the manufacturer’s moisture limits, installation instructions, compatible finishes, and treatment at foundation walls. Plan access to cleanouts and drains, and do not fasten through hidden radiant lines or services. Keep product data, moisture observations, and installation photographs with the renovation records. If the basement will contain a bedroom or suite, coordinate the floor with egress, partitions, acoustic goals, and mechanical design rather than choosing it as a separate retail purchase.
Mock up the critical transitions before ordering the full floor package. Check the stair landing, bathroom tile, mechanical-room threshold, exterior door, and any low appliance opening using the actual proposed thickness. Decide how baseboards and cabinets meet the system and whether sections must remain removable for service. For a Calgary project completed in phases, protect exposed edges and avoid trapping construction moisture beneath materials before the building is ready.
Treat storage and built-ins as part of the floor strategy. Heavy cabinets, a furnace platform, or fixed partitions can make future access difficult and may not belong directly on every floating system. Confirm the product instructions and sequence with the installer, then show which elements are installed first. Calgary owners should also keep spare finish material and a simple floor plan showing drains, cleanouts, and service routes so a later repair does not begin with unnecessary demolition.